


In the dynamic landscape of smartphones, staying at the forefront of the latest software updates is not merely a desire but a necessity. Google Pixel users, accustomed to waiting for official OTA updates, may find solace in knowing there’s a way to expedite the process. Sideloading an OTA update puts the power back into the hands of the user, allowing for a prompt installation of incremental updates on your Google Pixel phone.
This detailed guide aims to demystify the sideloading process, catering to users of varying technical expertise.
Understanding Android updates: Navigating incremental and major releases
Android updates come in two primary forms: incremental updates and major releases. Incremental updates, often released monthly, focus on refining existing features, improving security, and fixing bugs. Major releases, on the other hand, introduce substantial changes to the operating system. Sideloading becomes particularly valuable for users keen on experiencing incremental updates promptly rather than waiting for the official OTA release.
So here are the steps to sideload an OTA update on your Google Pixel phone.
Step 1: Download and install Android SDK platform-tools package
At the heart of sideloading lies the Android Debug Bridge (ADB), a versatile command-line tool facilitating communication between a computer and an Android device. To unlock the potential of ADB, users must first download and install the Android SDK Platform-Tools package. This package includes essential tools like ADB and Fastboot, instrumental in the sideloading process.
While obtaining the SDK Platform-Tools directly from the official Android developer site is a straightforward approach, users can streamline the process further by utilizing tools like Nexus Tools. This ensures quick access to ADB commands when needed during sideloading.
Step 2: Enable USB Debugging
With the Platform-Tools installed, the next crucial step involves enabling USB debugging on the Google Pixel device. This is accomplished by following these steps:
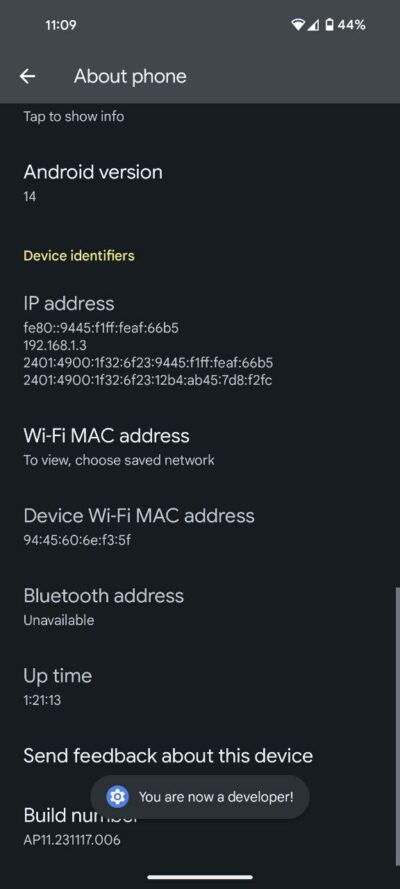
- Navigate to the device’s settings, specifically Settings > About phone.
- Here, tapping on the ‘Build number’ repeatedly activates Developer options.
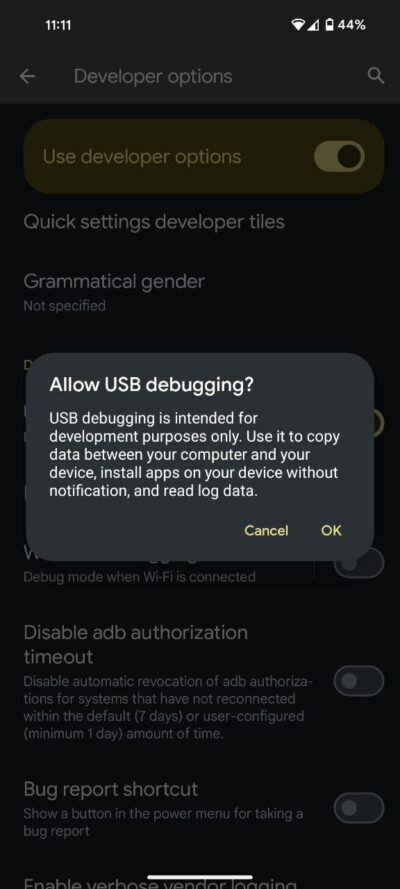
- Once Developer Options are accessible, head to Settings > System > Developer options> enable USB debugging.
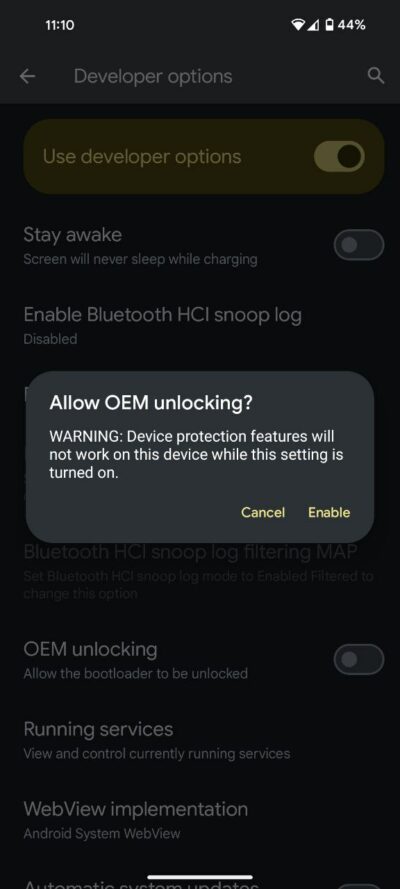
- While USB debugging is essential for the sideloading process, users may also consider enabling ‘OEM unlocking.’ Though not mandatory for sideloading OTA updates, this option becomes relevant if users anticipate downgrading their device at any point.
![]()
Step 3: Download the latest OTA file
With the necessary tools and settings in place, the focus shifts to obtaining the correct OTA file for the Google Pixel device. Google conveniently hosts all official builds on its dedicated developer site, ensuring authenticity and reliability. It is paramount to exercise caution during this step, ensuring the selection of the precise OTA update corresponding to the specific Pixel device. Mismatched updates can lead to failures in the sideloading attempt.
To enhance clarity, users should verify the support status of their Pixel device, as certain models may no longer receive official updates. The discontinuation of support for devices like the Google Pixel / Pixel XL, Pixel 2 / Pixel 2 XL, Pixel 3 / Pixel 3 XL, Pixel 3a / 3a XL, and Pixel 4 / 4 XL is outlined to help users make informed choices.
You can find OTA files required for the sideload process with appropriate dates and carrier-specific builds for every Google Pixel released on the official site.
Step 4: Boot your Pixel into Recovery Mode
Initiating the sideloading process requires booting the Pixel device into Recovery mode. This mode serves as the gateway for sideloading updates. The process involves fully powering down the device and using a combination of hardware buttons to access the Bootloader page.
Navigating to Recovery mode is facilitated by using the physical volume buttons to scroll and the power button to select. Alternatively, users can leverage ADB commands for a more seamless transition into Recovery mode. The specific commands for Windows and Mac are as follows:
- Windows: adb reboot bootloader or adb reboot recovery
- Mac: ./adb reboot bootloader or ./adb reboot recovery
Upon successfully entering Recovery mode, users will encounter a smaller Android icon lying down with an exclamation mark, indicating that they are ready to proceed.
Step 5: Navigate to ADB sideload
With the device in Recovery mode, users must now navigate to the ‘Apply update from ADB’ option. This selection prepares the device for sideloading. Connecting the Pixel device to the computer via USB is the next step, ensuring that the ADB tools are correctly installed.
Opening a Command Prompt or Terminal window in the platform-tools directory is essential for issuing ADB commands. A quick check to confirm the device connection is performed using the command adb devices (Windows) or ./adb devices (Mac/Powershell).
Step 6: Enter the sideload command
Assuming a successful device connection, users can proceed to enter the sideload command.
- For Windows, the command is adb sideload.
- For Mac/Powershell, it is ./adb sideload.
Including the filename of the downloaded .zip folder is crucial at this stage. Alternatively, users can opt for a user-friendly method of dragging and dropping the .zip folder into the Command Prompt or Terminal window, eliminating the risk of typos or errors.
Step 7: Reboot your phone
Upon the completion of the sideload, the Pixel device will return to Recovery Mode. At this juncture, users must select the ‘Reboot now’ option using the power button. The subsequent reboot signifies the successful installation of the latest OTA update on your Google Pixel phone.
Step 8: Verify the update
To confirm the successful sideload, users can navigate to Settings > About phone > Android version. The displayed patch should align with the sideloaded update, providing tangible evidence of a seamless and successful process.
Important note: While the sideloading process is engineered not to wipe the device, adopting a proactive approach by backing up essential data remains a prudent practice. This precautionary step ensures that, in the rare event of an issue, users have a safeguard in place to protect irreplaceable data.

Karanjot Sidhu
1024 Posts
A computer science engineer who loves tech and won't stop talking about it. Here at Piunikaweb, I mostly cover Google Pixel deals and how-tos, though you may find me covering Pixel news as well sometimes. Apart from being a nerd, i love gaming and watching movies in my free time.