Recently, we have reported that the Mi Note 10’s Android 10 has been put in the back burner as the Chinese OEM, Xiaomi pushed the Android 9 Pie-based March security update for the device.
Though Android 10 is nothing new as of now, and a majority of the compatible phones are already running on Android 10, keeping in mind the history of Android 10 updates from Xiaomi (ask the Mi A2 and A3 users), it is better to give Xiaomi the time in delivering a nicely cooked Android 10 update that is bug-free and provides a great experience to its users.
Xiaomi Mi Note 10, which was released back in November 2019, came with Android 9 Pie out of the box and the unit is expecting its first major Android firmware upgrade in Q2 of 2020.

While the users are awaiting the Android 10 update on their phones, there is a new guide available for the Mi Note 10, that lets you flash TWRP and root your device using Windows and Linux PC.
It goes without saying that you should root your phone, only if you know what and why you are doing as you will lose your device’s warranty, if anything goes south, you will brick or permanently damage your phone, etc.
But on the good side, you will be able to install restricted apps, install custom ROMs, and tweak the system settings on your Mi Note 10. Now, with that being said, let us take a look at the guide itself:
Step 1
Probably the most important thing that you need to go through, is the list of pre-requisites which includes all the necessary items required for this rooting procedure.
Pre-requisites:
– Take a complete backup of your phone.
– You should have an unlocked bootloader. For a complete guide follow here.
– Download the official TWRP recovery for Mi Note 10 from here.
– Downlaod ADB Fastboot tools: Windows | Linux (Ubuntu)
– Download the latest Magisk Manager from here.
Step 2
Follow the guides below on flashing TWRP recovery on your Mi Note 10 using Windows PC or Linux PC.
Using Windows PC
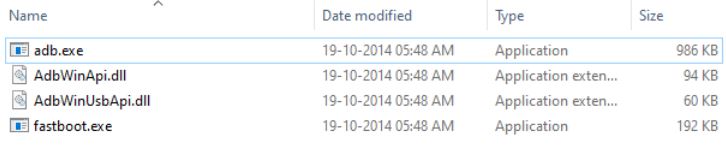
1. You need to download and extract the contents of the ADB and Fastboot tools.
2. Transfer the TWRP recovery image and Magisk Zip file to the same folder where you have extracted the contents of the ADB and Fastboot tools.
3. Turn off your phone and boot into the Fastboot mode by pressing Volume Down Button and Power button.
4. Then, connect your Mi Note 10 to your PC using a USB cable.
5. Open a command prompt in the same folder where you have extracted the contents of the ADB and Fastboot tools.
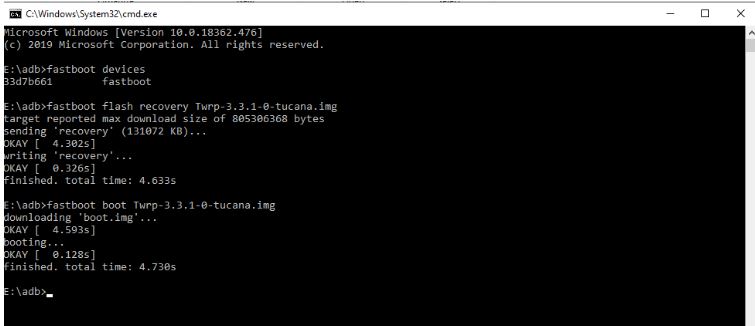
6. Enter the below commands and hit Enter, one by one:
– Fastboot devices
– Fastboot flash recovery twrp.img (replace twrp.img with original filename)
– Fastboot boot twrp.img
7. Now, your phone will boot into TWRP.

Using Linux (Ubuntu)
1. You need to open a command terminal by pressing Alt + Ctrl + T use the below command to install ADB and Fastboot drivers.
– sudo apt install android-tools-adb android-tools-fastboot
2. Now transfer the TWRP Recovery image and Magisk Zip file to any folder.
3. Turn off your phone and boot into the Fastboot mode by pressing Volume Down Button and Power button.
4. Then, connect your Mi Note 10 to your PC using a USB cable.
5. Make sure to change directory to the folder in which you have copied TWRP.
6. Enter the below commands and hit Enter, one by one:
– Fastboot devices
– Fastboot flash recovery twrp.img (replace twrp.img with original filename)
– Fastboot boot twrp.img
7. Now, your phone will boot into TWRP.
Step 3
Now you need to root your phone using Magisk Manager. Follow the steps below to do that:
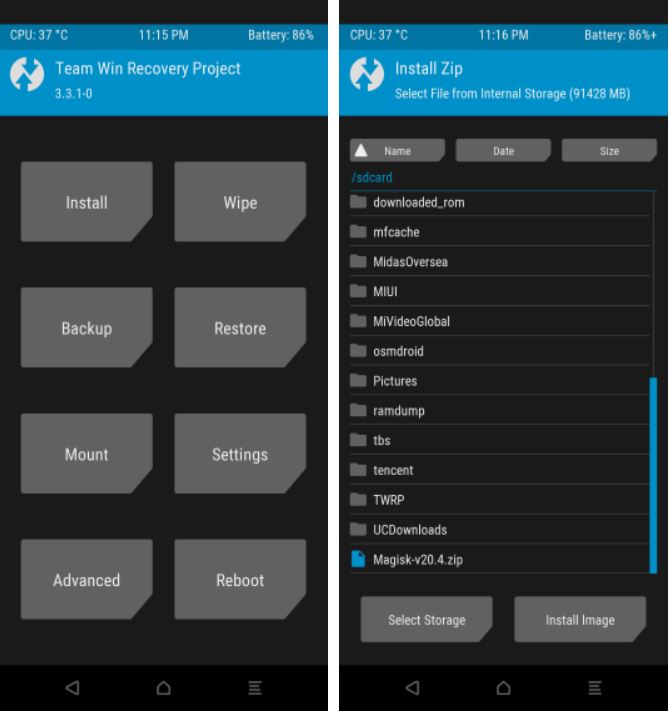
1. Once your phone has booted up in TWRP, you need to copy the Magisk zip from the ADB folder into your Mi Note 10’s internal memory.
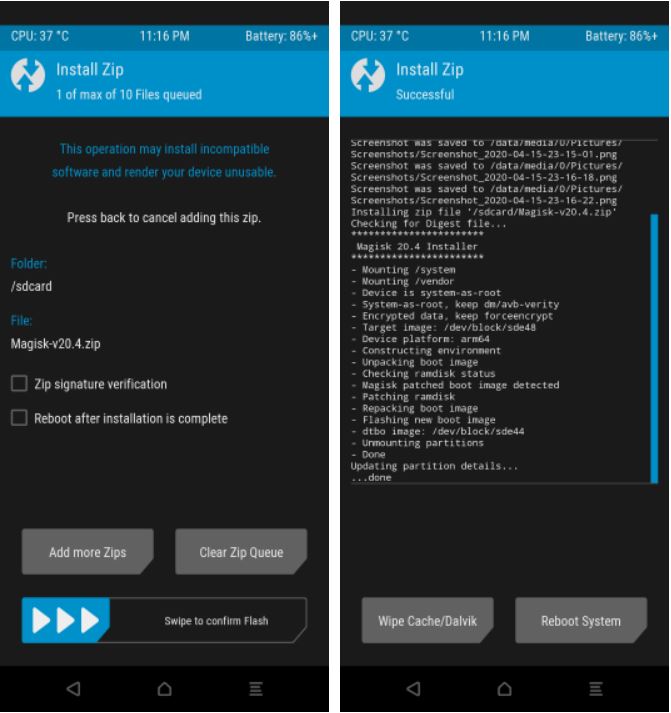
2. Now in TWRP, click on Install and locate the Magisk Zip.
3. Swipe the slider at the bottom to flash Magisk on your phone.
4. Once you are done flashing Magisk, head over to Reboot System to boot your phone into the system.
5. A Magisk App installed on your phone.
6. That’s it!

So, with that, you successfully gained root access on your Xiaomi Mi Note 10 phone. Note that this guide is for those users who know about fiddling with the system tweaks. Rest assured if you follow the guide properly, no issues will creep up on your phone.
Happy Rooting!
PiunikaWeb started as purely an investigative tech journalism website with main focus on ‘breaking’ or ‘exclusive’ news. In no time, our stories got picked up by the likes of Forbes, Foxnews, Gizmodo, TechCrunch, Engadget, The Verge, Macrumors, and many others. Want to know more about us? Head here.

Sagar Naresh
989 Posts
A Six Sigma and Google Certified Digital Marketer who also holds an MBA degree in Finance and Marketing. A technology and automobile enthusiast who likes to play guitar, travel, and relax. Entrepreneur and Blogger.
Next article View Article