


In a world where convenience reigns supreme, Google Pixel’s Face Unlock offers a seamless way to access your beloved device. No more fumbling in the dark, no more forgotten passwords, just the seamless fusion of your gaze and your Pixel, unlocking a world of possibilities.
So, prepare to ditch the passwords and set up Face Unlock on Google Pixel phones using these steps:
- Locate the Settings app, distinguished by a gear icon, on your home screen or in the app drawer. Open the app to reveal a plethora of options that enable you to customize your device.
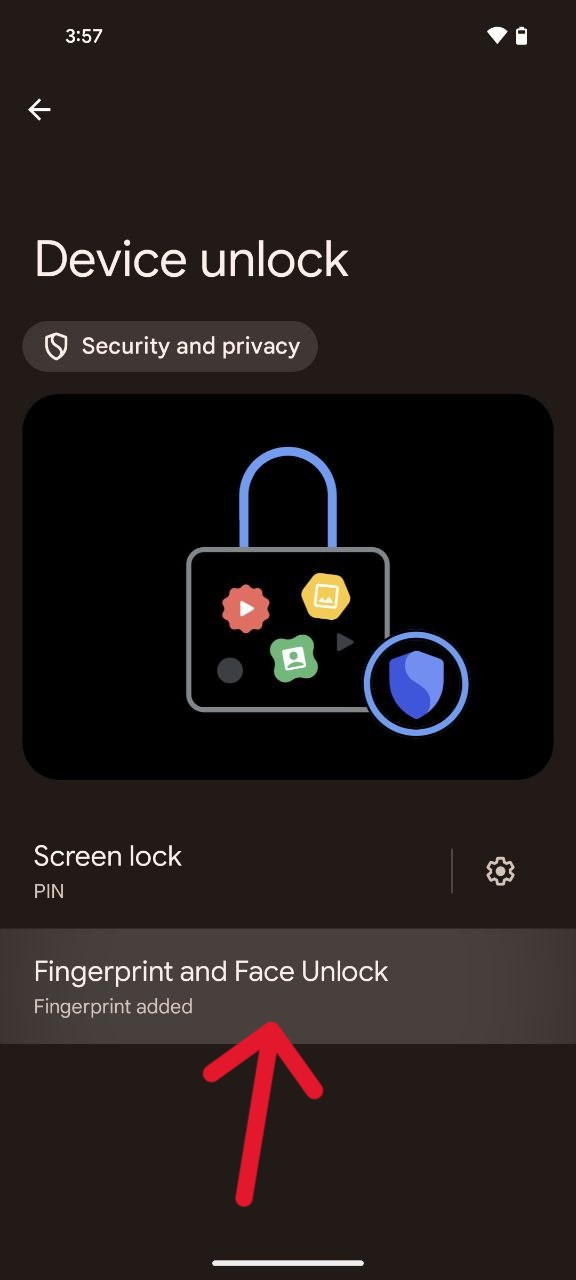
- Within the Settings app, scroll down until you find the ‘Security & privacy’ section and tap on it.
- Under the ‘Security & privacy’ section, locate and tap on ‘Device unlock.’ This leads to a range of unlocking options, including the coveted Face Unlock feature that combines security and ease of use.
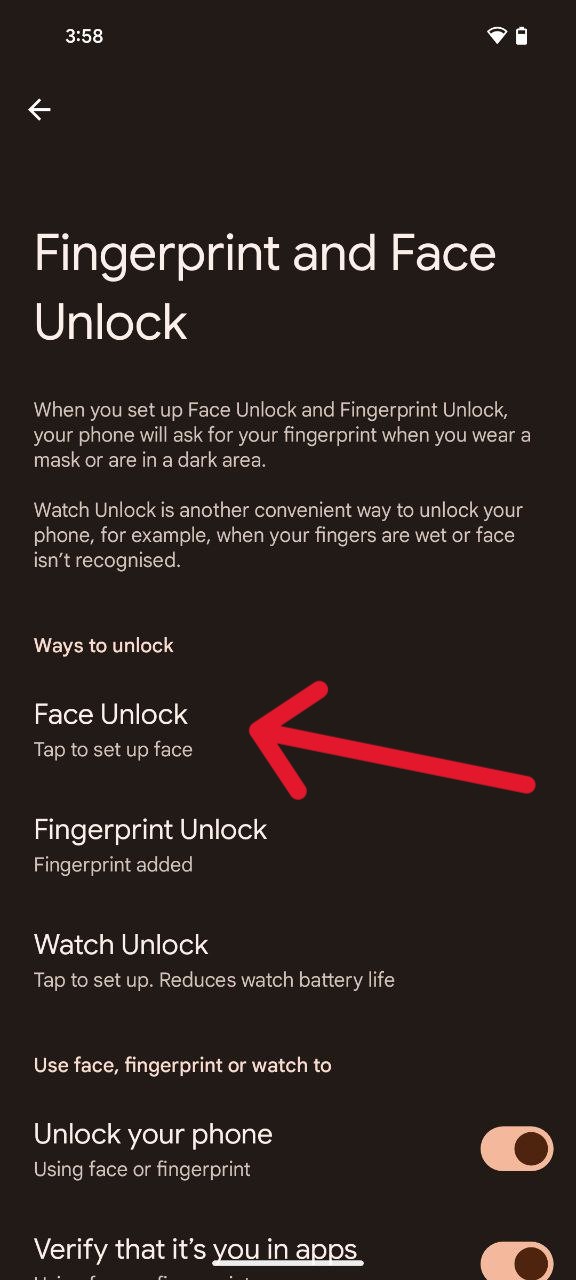
- Tap on ‘Fingerprint and Face Unlock’ to delve into the detailed settings. If you’ve already set up a screen lock, the system will prompt you to confirm it at this stage. Confirm your existing screen lock to proceed to the next step.
- Tap on ‘Face Unlock’ to access its settings.
- Before commencing the Face Unlock enrollment process, take a moment to read the provided information about Face Unlock. Gain insights into its limitations and security considerations. Once informed, tap on ‘I agree’ to express your consent.
- Initiate the Face Unlock setup by tapping on ‘Start.’ Hold your Pixel phone at eye level and position your face within the designated circle on the screen. This is the crucial step where the facial recognition system captures various angles of your face for enhanced accuracy.
- As prompted, slowly tilt your head up and down to fill the circle on the screen with blue tiles. This nuanced approach ensures that the system captures your face comprehensively, making Face Unlock more reliable in different scenarios.
- Once the circle is complete, tap on ‘Done’ to conclude the Face Unlock enrollment process. Your Pixel phone is now equipped with a personalized facial recognition profile, ready to enhance your device interaction.

![]()

![]()
![]()

That’s it, with Face Unlock successfully set up, unlocking your Pixel phone becomes a breeze.

Karanjot Sidhu
1024 Posts
A computer science engineer who loves tech and won't stop talking about it. Here at Piunikaweb, I mostly cover Google Pixel deals and how-tos, though you may find me covering Pixel news as well sometimes. Apart from being a nerd, i love gaming and watching movies in my free time.
Next article View Article
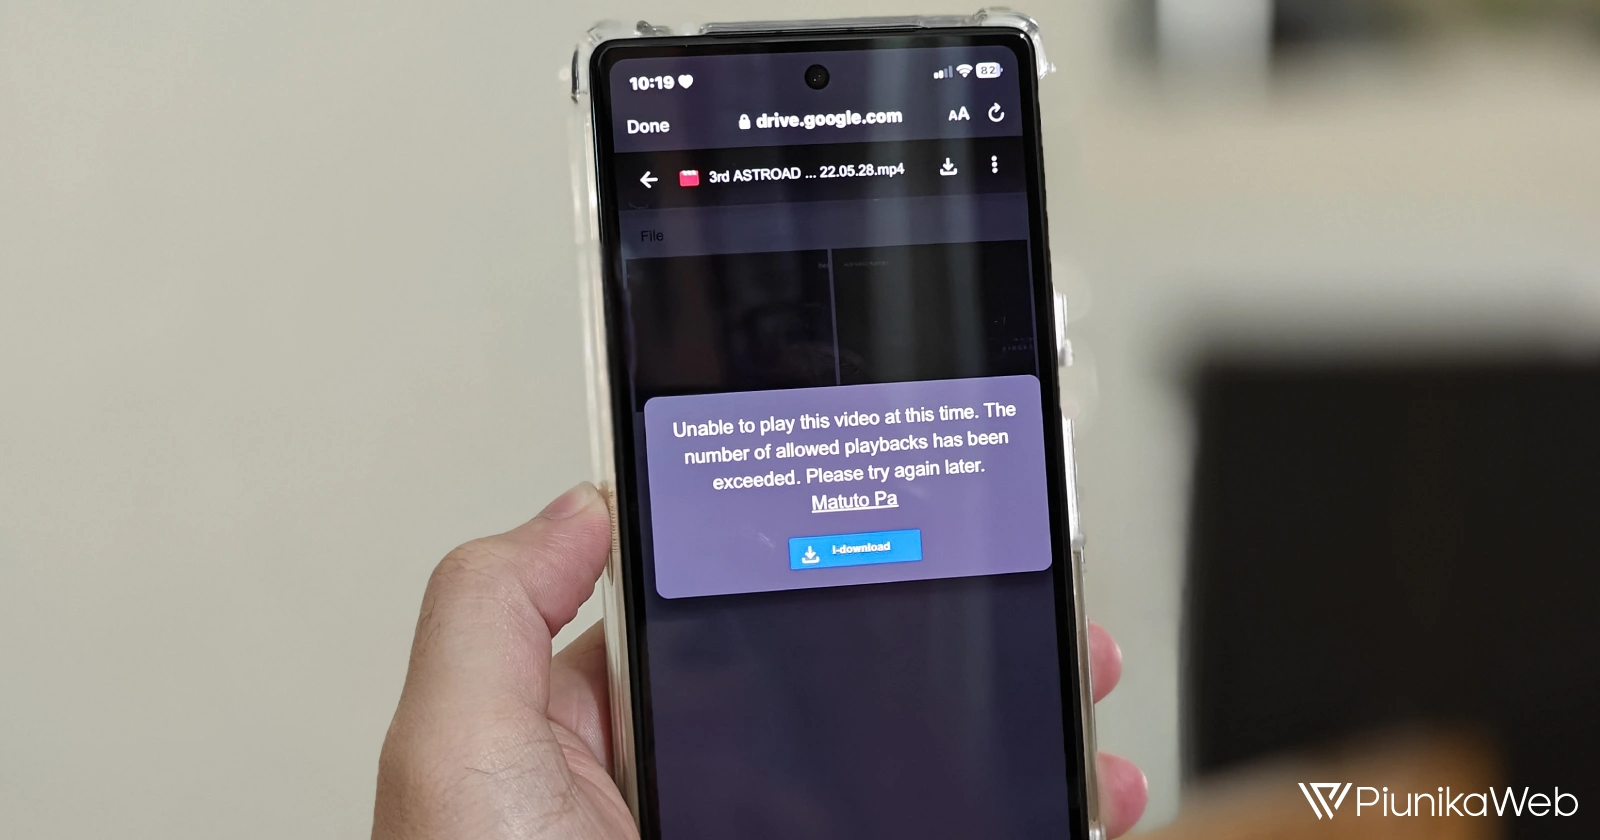
Google Drive not letting users play videos, throws 'allowed playbacks has been exceeded' error
Google Drive users have been dealing with an issue for years where they get an 'allowed playbacks has been exceeded' error when trying to play videos. And Google has still...
Feb 20, 2024 2 Min Read