Here’s the crux of the article in video form:
Ever taken a selfie and noticed how harsh shadows or uneven lighting wash out your face? Or perhaps you want to add a soft, studio-like glow to your portrait? Google Photos has a new feature called ‘Balance Light’ within its Portrait Light settings that can help you achieve just that.
How to use Balance Light on Google Photos
Balance Light is a new tool available in Google Photos that allows you to soften shadows and improve the overall lighting on your selfies. It works by analyzing the light direction and intensity in your photo and then applying a subtle adjustment to create a more balanced and flattering effect.
Here are the steps to use it:
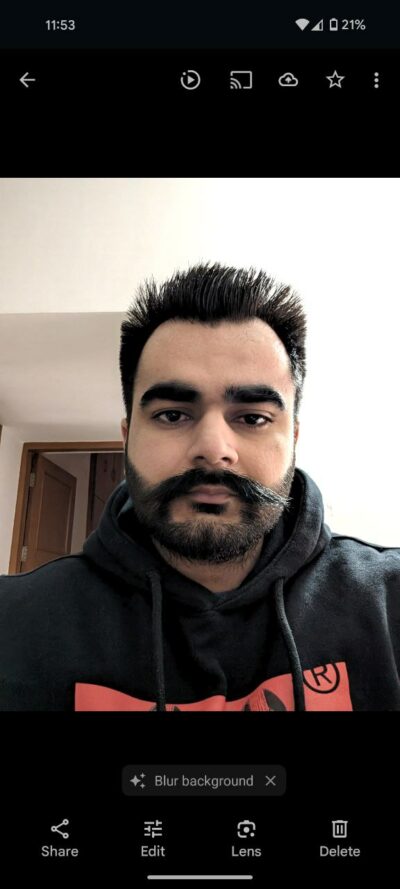
- Open the Google Photos app and select the selfie you want to edit.
- Tap the Edit button.
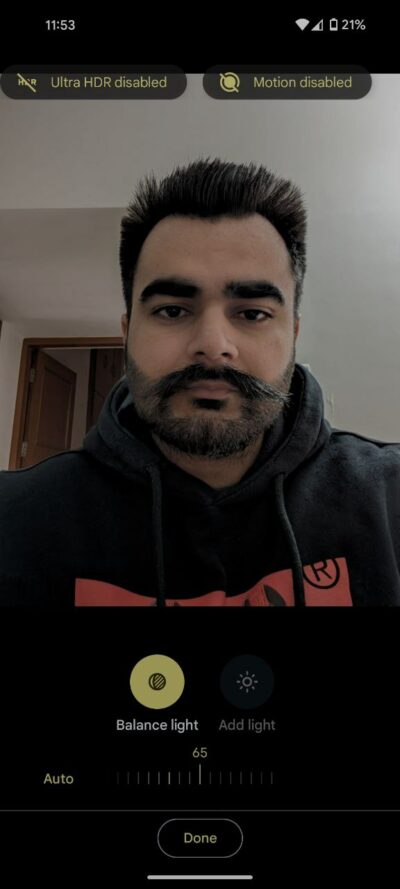
- Select Tools from the bottom menu and choose Portrait Light.
- Tap the Balance Light icon.
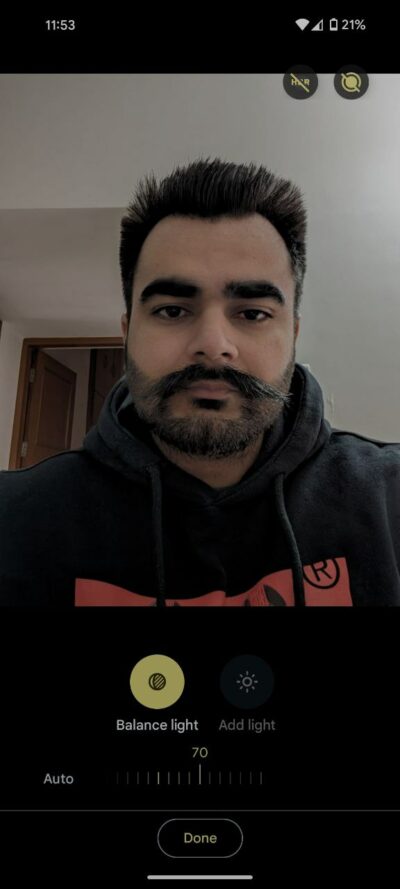
- By default it’s set to ‘Auto’ but you can tap on it and then move the slider to adjust the intensity of the light balancing according to your preference.
- Tap Done when you’re satisfied with the results.

Tips and some additional things to keep in mind:
- Start with a well-lit photo: The better the original lighting, the more natural and realistic the results will be.
- Use Balance Light sparingly: Too much of it can make your selfie look unnatural or washed out.
- Experiment with different angles: Try moving the light source around to see how it affects the shadows and highlights on your face.
- Balance Light is currently only available is only available on Pixel 7 and later devices, including Pixel Fold.
- It works best on selfies where the face is clearly visible and takes up a significant portion of the frame.
- Balance Light can be used on both new and old photos in your Google Photos library.
Overall, Balance Light is a great tool for improving the lighting on your selfies. It’s easy to use and can make a big difference in the overall look and feel of your photos. If you have any query, please let me know in the comments down below.

Karanjot Sidhu
1024 Posts
A computer science engineer who loves tech and won't stop talking about it. Here at Piunikaweb, I mostly cover Google Pixel deals and how-tos, though you may find me covering Pixel news as well sometimes. Apart from being a nerd, i love gaming and watching movies in my free time.
Next article View Article