


The hype around iOS 17 had Apple users rushing to get it! Some even went as far as installing the beta version to get a sneak peek into what it had to offer.
However, after getting the latest iOS version, the excitement quickly died down as users started facing several issues with their devices. Some had their iPhones stuck on the Apple logo, while others ended up with a device that kept restarting for no reason. With so many issues, the only thing that made sense was to downgrade from iOS 17 to iOS 16.
What should I do before downgrade to iOS 16?
While the process of downgrading iOS 17 to 16 is not that technical, there are a few things that one must keep in consideration before jumping into it. For instance:
- Check compatibility: Make sure your iPhone is compatible with iOS 16 to avoid further issues.
- Back-up your data: Remember to back up your data to iCloud, iTunes, or a third-party app like UltFone iOS Data Manager.
- Keep everything at hand: An iOS downgrade requires a PC and a USB cable. If you’re using Windows, make sure you have the latest iTunes version installed.
With that sorted, let’s have a look at…
How to downgrade from iOS 17 to iOS 16 without losing data?
If you are looking for a safe and reliable way to downgrade iOS 17 to 16 on iPhone/iPad without losing data, we recommend using UltFone Downgrade Tool.
It is a user-friendly and professional tool that can help you revert iOS 17 to 16 in just a few clicks. And the best part is that you don’t need any technical skills to use it.
Advantages of UltFone downgrade tool
Let’s have a look at some reasons why you should use the UltFone Downgrade Tool to downgrade from iOS 17 to iOS 16:
- Quick and easy to use: UltFone Downgrade Tool is an easy-to-use software that enables you to remove iOS 17 in a single click.
- No jailbreak required: It gets the job done without jailbreaking your device or losing data.
- Wide compatibility: This tool is compatible with Windows, Mac, and all the iPhone and iPad models.
- Resolve 150+ iOS-related issues: It is a complete iOS toolkit that fixes more than 150 iOS issues and also solves the iPhone getting stuck problem when downgrading.
Follow the below steps to downgrade from iOS 17 to iOS 16
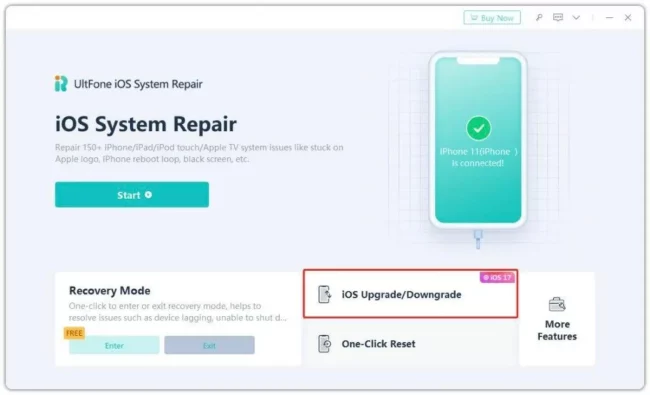
- Download and install UltFone iOS Downgrade Tool in your computer. Connect your iPhone or iPad to it and click on “iOS Upgrade/Downgrade” to start the process.
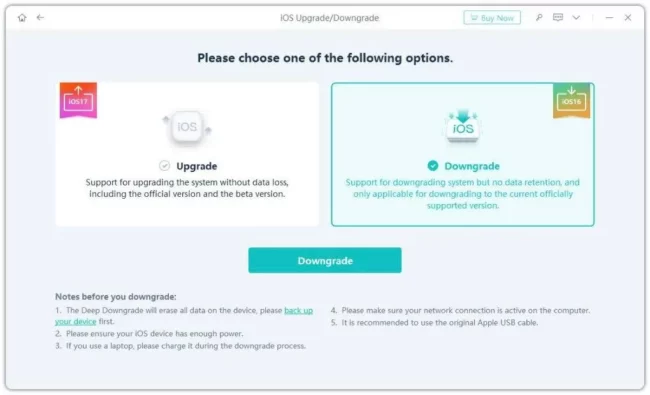
- Choose “Downgrade” option in the below picture.
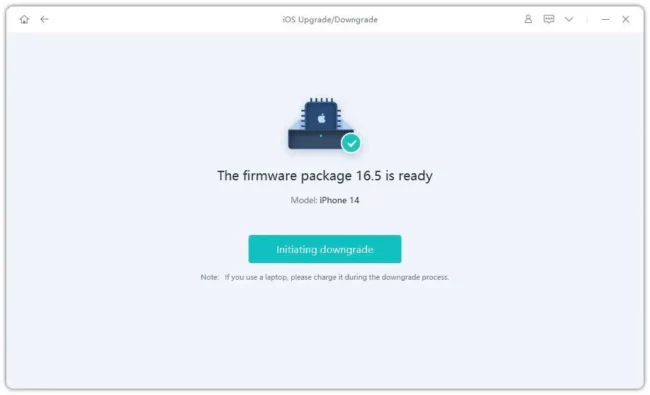
- Download the latest firmware file and begin with the removal process.
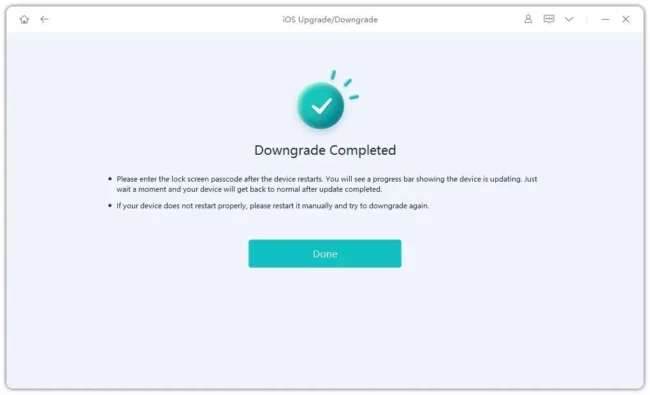
- Now wait for a few minutes and it will successfully downgrade your iPhone or iPad to iOS 16.
You can also check the video demonstration right below if you need a visual guide.
Unbiased comparison for 4 iOS 17 downgrade ways
If you aren’t happy with iOS 17 and are wondering how to go back to iOS 16 from 17, you can do so in 4 different ways.
The first method is by using the UltFone Downgrade Tool, which we have discussed earlier. The second method is to remove the iOS 17 Beta Software Profile via your device settings.
Moreover, if you have used iTunes or Finder to upgrade your device, you can use the backup to downgrade to iOS 16.
Here’s a detailed comparison of all 4 methods:
| Method | Advantages | Disadvantages |
|---|---|---|
| UltFone Downgrade Tool | – It’s a quick and straightforward method – There’s no risk of data loss |
/ |
| Device Settings | – It does not require a PC and can be carried out from your device settings | – It does not have a 100% success rate – There is a risk of data loss |
| iTunes | – It is the official downgrade method – It works on both Windows and macOS |
– It requires technical knowledge – It works using DFU Mode |
| Finder | – It is the official downgrade method for Mac users | – It is a more complicated process – It is not compatible with Windows |