


For Pixel phone users, managing contacts just took a significant leap forward in terms of convenience. Google’s recent update to the Contacts app introduces a streamlined system for assigning custom ringtones to individual contacts.
In the past, customizing ringtones for specific contacts involved navigating through a plethora of settings menus. This process was time-consuming and frustrating, especially for users who prefer a more direct approach. Thankfully, those days are over.
Set a custom ringtone for a contact on Pixel phones
Assigning custom ringtones now takes just a few steps within the familiar Contacts app:
- To begin, launch the Contacts app, typically pre-installed on your Pixel phone’s home screen or app drawer.
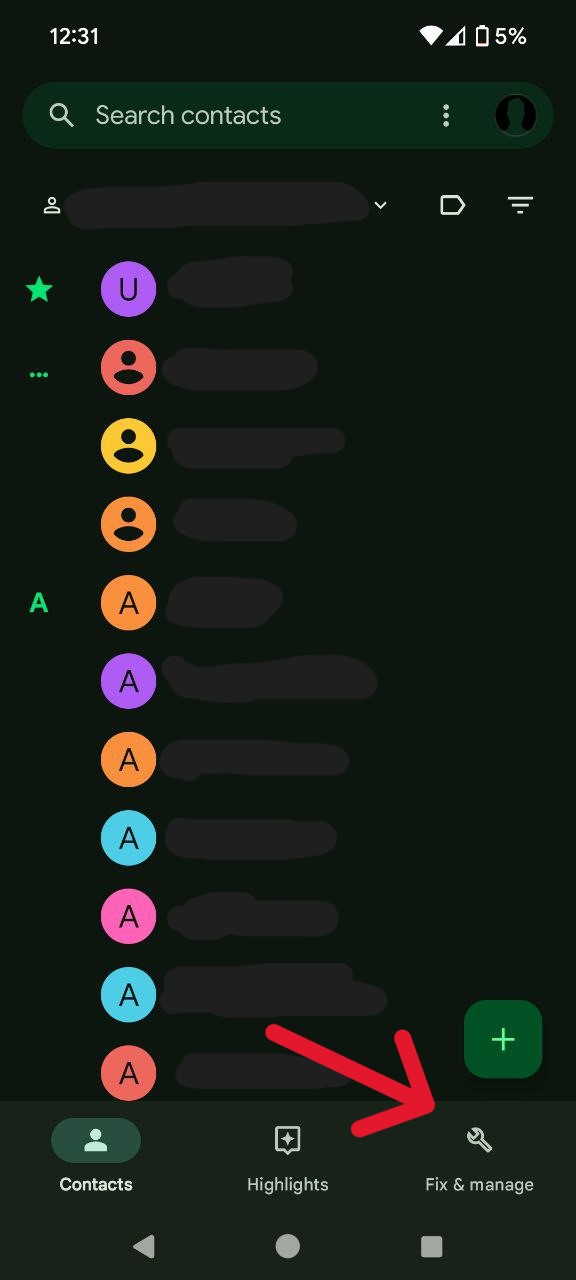
- Once the Contacts app is open, locate the ‘Fix & Manage’ tab. This tab is usually situated in the bottom right corner of your screen.
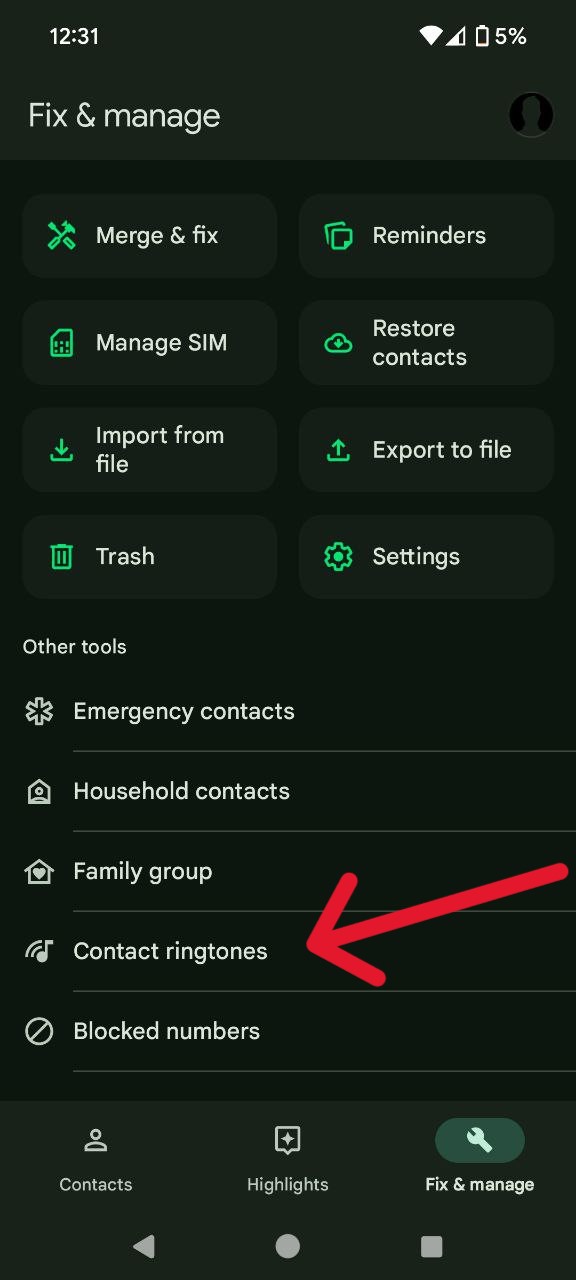
- Upon entering the ‘Fix & Manage’ section, scroll down until you find the option labeled ‘Contact ringtones.’ Select this option to proceed to the dedicated ringtone assignment area.
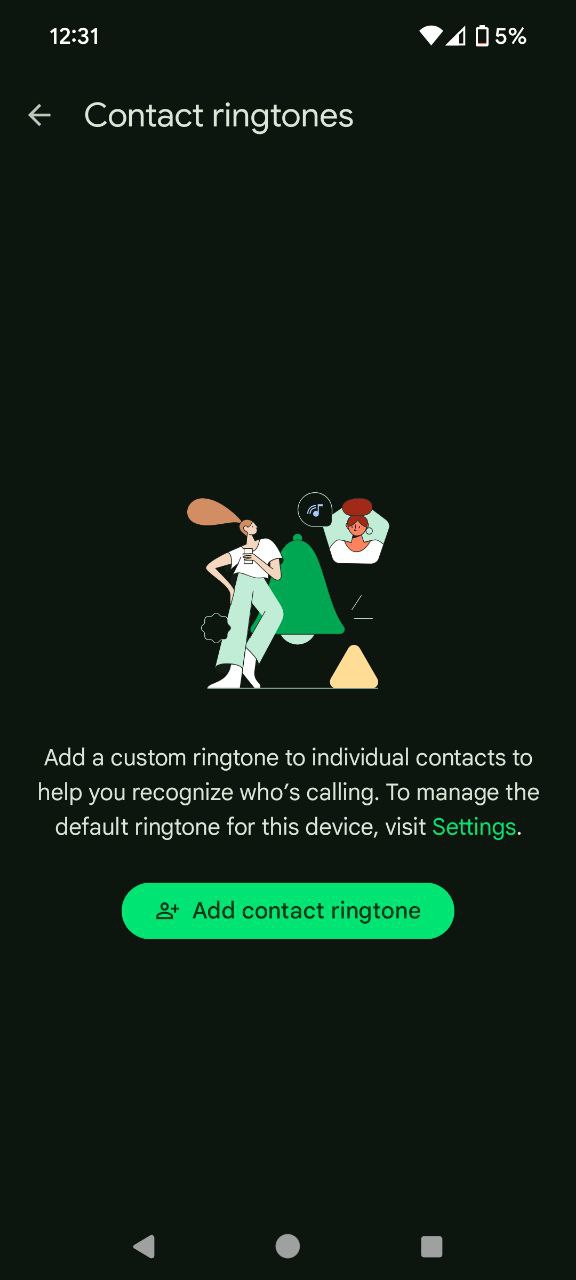
- Select ‘Add contact ringtone’ option. You’ll now be presented with a list of your contacts. Simply select the contact for whom you wish to assign a unique ringtone.
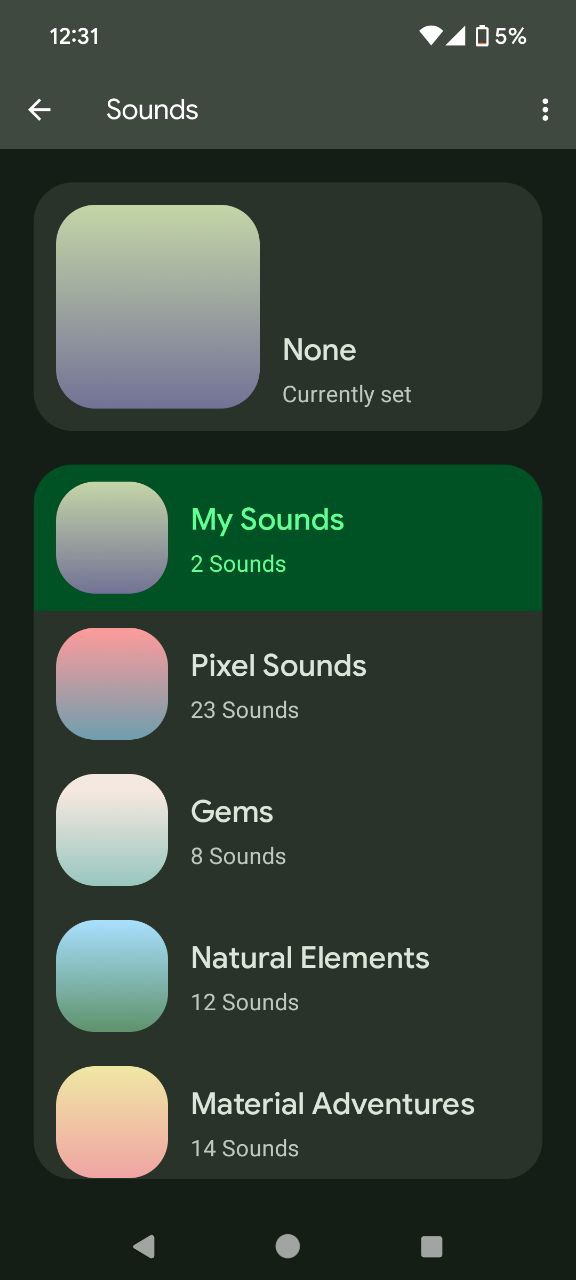
- After choosing a contact, explore the variety of ringtone options available. This selection encompasses the default ringtones pre-loaded on your Pixel phone, alongside any custom ringtones you may have downloaded from various sources. There are some entertaining ones out there, such as a cat meow or henhouses sound, which I find funny.
- Once you’ve identified the ideal ringtone for your contact, select it from the list. The chosen ringtone will then be automatically assigned to that specific contact.
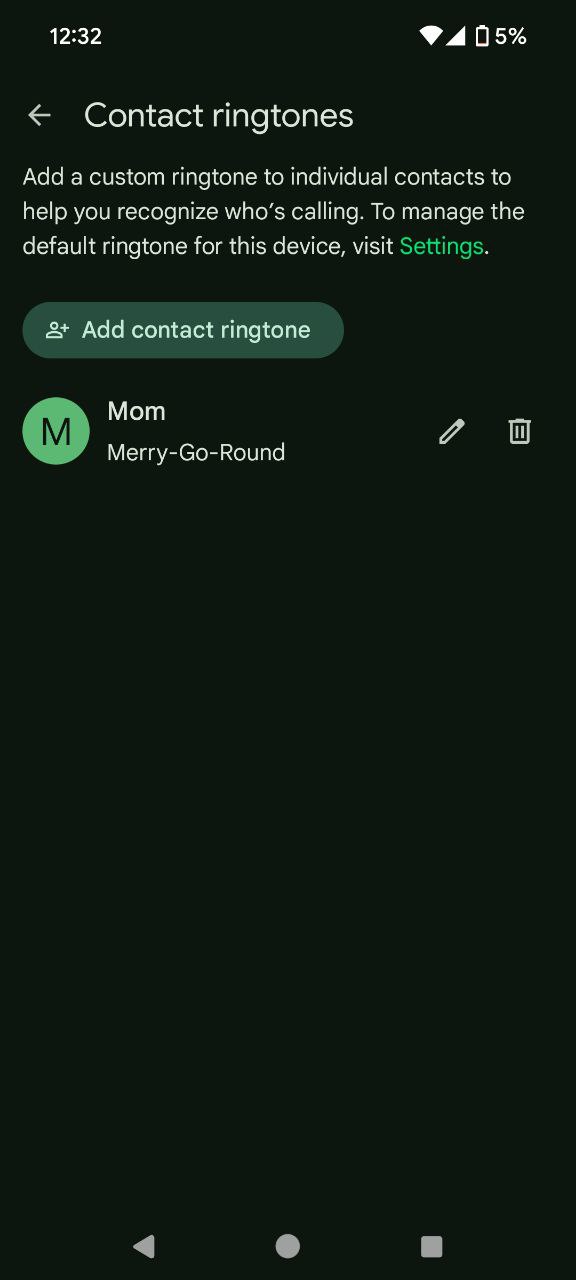
With your selection confirmed, you’ve successfully set a custom ringtone for that particular contact on your Pixel phone. Now, whenever that contact calls you, their designated ringtone will sound, allowing you to distinguish them from other callers, even before answering the phone.

Karanjot Sidhu
1024 Posts
A computer science engineer who loves tech and won't stop talking about it. Here at Piunikaweb, I mostly cover Google Pixel deals and how-tos, though you may find me covering Pixel news as well sometimes. Apart from being a nerd, i love gaming and watching movies in my free time.