As someone who loves capturing photos and videos, you will probably be aware of the potential disruptions.
Thus, to create the ideal audiovisuals, a video editing tool is a necessity. And the good news is that Google Photos offers some efficient video editing tools and features.
It also lets users remove audio from the clip or stabilize it to provide clarity all for free.
If you want to know more about it, our article will help you discover the best video editing tricks of Google Photos.
Note: These tricks will work on both Android as well as iOS devices.
Stabilizing videos
If your phone does not have optical image stabilization (OIS) hardware, your videos might end up shaky or disrupted. An unbalanced output is not attractive, and it could leave the wrong impression in the viewer’s eyes.
Luckily, Google Photos offers a stabilizer tool that lets you add the smoothness to the video.
If you want to use this feature on your videos, then follow the steps below:
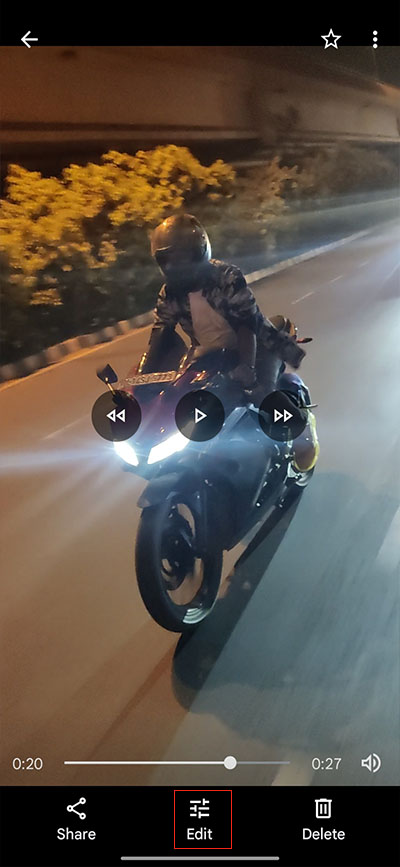
- Open the Google Photos app
- Select the video you wish to edit
- Click on the ‘edit’ button from the bottom bar
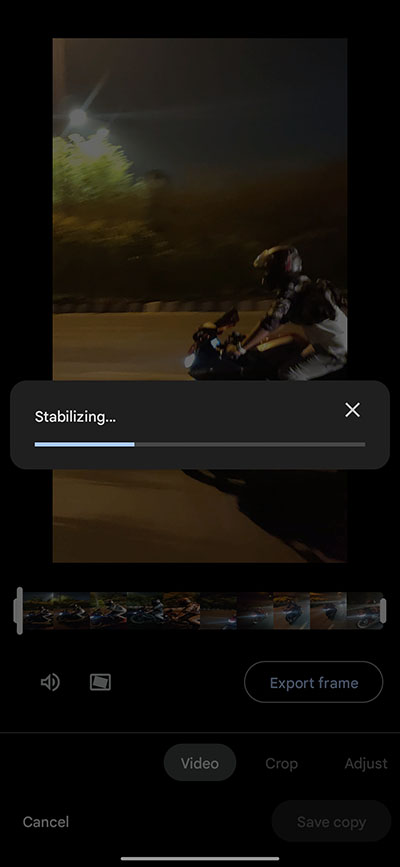
- Tap on the ‘stabilizer’ icon
- Allow Google Photos to make the required changes after running the stabilizer
- Click ‘save copy’ to save the new video

Click/tap to enlarge images
Note: The duration of the process will depend on the video’s length.
Export a frame
If you want to capture the perfect moment from the video as a picture, Google Photos offers an ‘export a frame’ feature, particularly for this purpose.
It allows you to catch any interval from the video conveniently.
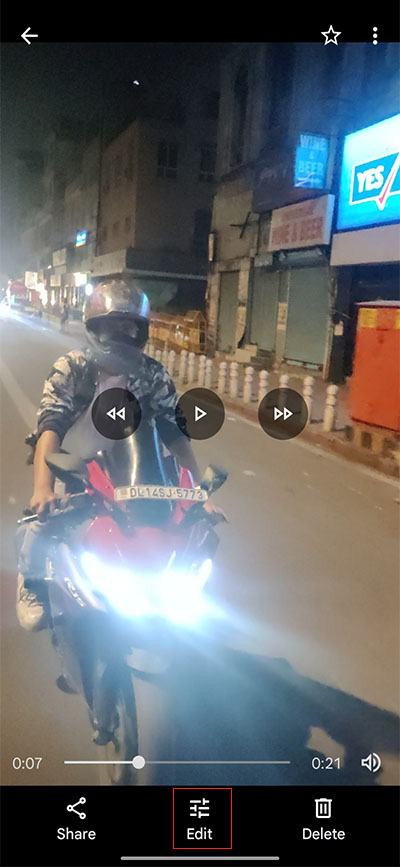
- Open the Google Photos app
- Select the video you want to use
- Click on ‘edit’ from the bottom bar
- On the videos tab, it will display the ‘export frame’ button
- Stop the video at any particular interval and tap on it
- Google Photos will export the image to the phone’s gallery

Click/tap to enlarge images
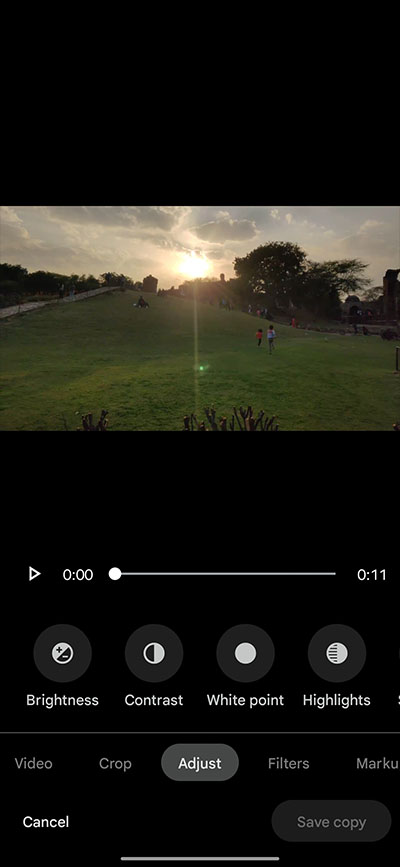
Adjust the video profiles
This is one of the most valuable tools offered by Google Photos. The feature is beneficial for making last-minute changes to any video through the app.
Google Photos offers different adjustment tools, including brightness, white points, contrasts, highlights, shadows, and black points.
It also provides saturation, warmth, tint, skin tone, blue tone, and vignette.
To adjust the above-mentioned tools, follow the steps below.
- Open the Google Photos app
- After choosing the video, you want to edit, click on ‘adjust’ from the below bar
- Choose the editing feature you want to apply
- Modify the intensity from the slider as per your requirements
- Tap ‘done’ to save the changes
- Click on ‘save copy’ to download the edited video

Click/tap to enlarge images
This concludes our article on the best video editing tricks of Google Photos. If you want to read more informative content on Google Photos, click here.
PiunikaWeb started as purely an investigative tech journalism website with main focus on ‘breaking’ or ‘exclusive’ news. In no time, our stories got picked up by the likes of Forbes, Foxnews, Gizmodo, TechCrunch, Engadget, The Verge, Macrumors, and many others. Want to know more about us? Head here.

Tags
Best tricks to edit videos in Google Photos best video editing tricks of Google Photos Google Photos video editing tricks to edit videos
Asif Sameer
74 Posts
I am a technophile, writer, YouTuber, and SEO analyst who is insane about tech and enjoys experimenting with numerous devices. An engineer by degree but a writer from the heart.
Next article View Article