If you’re a private person, you would certainly like to keep your images private and keep them out of the public’s view.. While there are numerous measures to counter the problem, one of the most effective methods is to create a locked folder.
Google Photos is used by countless people globally due to its brilliant editing, storage, and privacy features.
However, we are only concerned with privacy features offered by Google Photos. A locked folder keeps people from viewing your photos as it removes the selected photos from the main image gallery.
It also keeps you from viewing your photos stored in the locked folder on another device. The access to a locked folder is just like your screen lock requiring fingerprint, pin, pattern, or face unlock.
Wondering how to set up a locked folder on Google Photos? Follow the article to find out the complete way to create a locked folder.
What is a Locked Folder and its benefits?
A locked folder has various benefits. It is highly beneficial for people who refrain from sharing their images online and prefer to keep them private.
It will also remove your photos from the main image library, hence, disabling people from viewing them.
However, the benefits of a locked folder aren’t restricted to this.
The images of a locked folder aren’t uploaded to the cloud due to which they can’t be shifted to other devices and accessed on them. Additionally, screenshots of these images can’t be taken.
Therefore, the Locked Folder feature plays a pivotal role in ensuring utmost confidentiality and privacy.
How to set up a Locked Folder in Google Photos?
Setting up a locked folder in Google Photos has never been easier. Follow the steps to seamlessly created a locked folder to ensure privacy like never before:
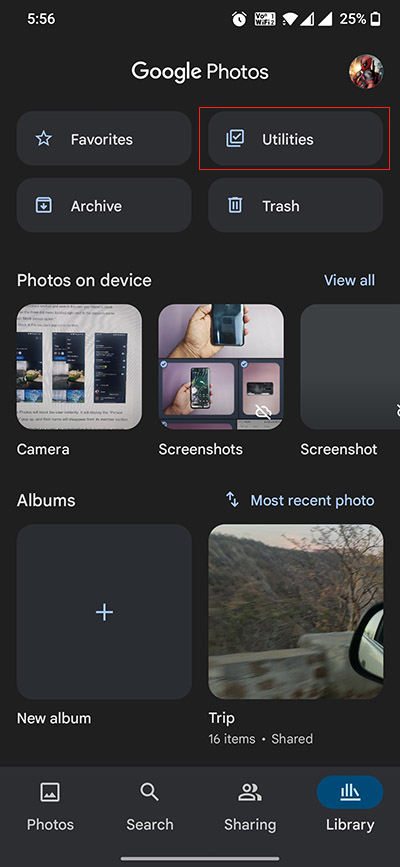
- To start, open your Google Photos application and click on the ‘Utilities’ section
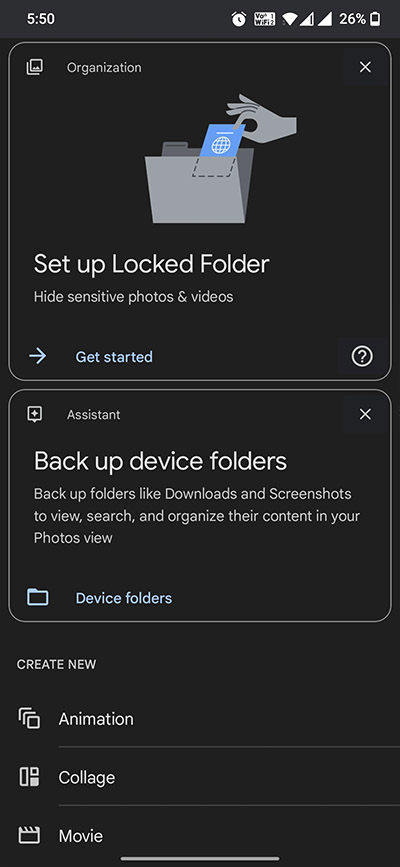
- On the following menu, you’ll come across an option reading out Set Up Locked Folder. Click on that
- It will ask for your screen lock method. It can be a fingerprint, pattern, pin, or any other mode depending on your chosen screen lock
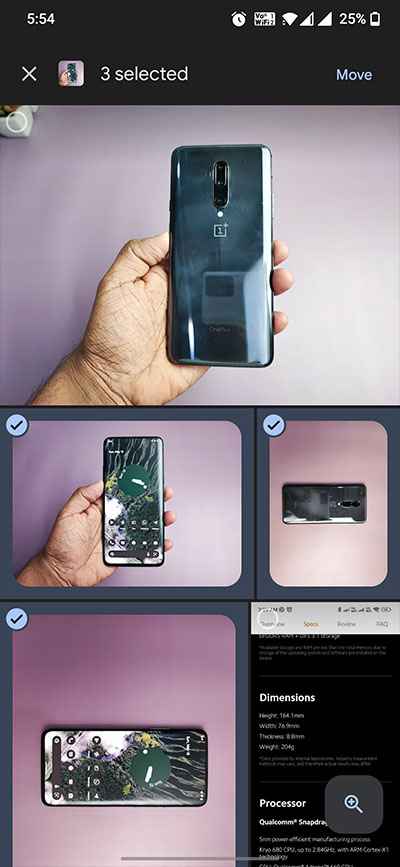
- You’ll see a Move Items option on the following menu. Click on that and select the desired pictures. After the selection is complete, click on the Add Items button shown at the top
- Next up, select the videos or images you want to store in the locked folder. When you’ve chosen the pictures, tap Move. Tap Move again when the confirmation menu pops up
Click/tap to enlarge images
For more Google Photos related info, check out this page.
PiunikaWeb started as purely an investigative tech journalism website with main focus on ‘breaking’ or ‘exclusive’ news. In no time, our stories got picked up by the likes of Forbes, Foxnews, Gizmodo, TechCrunch, Engadget, The Verge, Macrumors, and many others. Want to know more about us? Head here.


Asif Sameer
74 Posts
I am a technophile, writer, YouTuber, and SEO analyst who is insane about tech and enjoys experimenting with numerous devices. An engineer by degree but a writer from the heart.
Next article View Article