There are several Xiaomi devices that are yet to bag the MIUI 12 update and among them, the Redmi Note 9S, also known as Xiaomi Redmi Note 9 Pro in India.
While the wait is still on for the Redmi Note 9S MIUI 12 update, a Mi Community moderator is suggesting users to go for the Redmi Note 9 Pro MIUI 12 India ROM.
For now, there’s no ETA. You may unlock the bootloader and flash the Indian Fastboot ROM as suggested above, else wait for the Global release.

There are two ways to manually install a MIUI ROM on a Xiaomi device. So, let’s see how you can install the MIUI 12 update on your Redmi Note 9S.
Unlocking the Bootloader
This is the most important part as it is not possible to manually install or flash a ROM without unlocking the device bootloader. Here’s how to go about it:
1. Download and extract the Mi Unlock Tool on your PC.
2. Enable Developer Options on your Redmi Note 9S by heading over to the About Phone section in Settings and tapping seven times on MIUI version.
3. Now, head over to the Developer Options under Additional Settings and enable USB Debugging and OEM Unlocking.
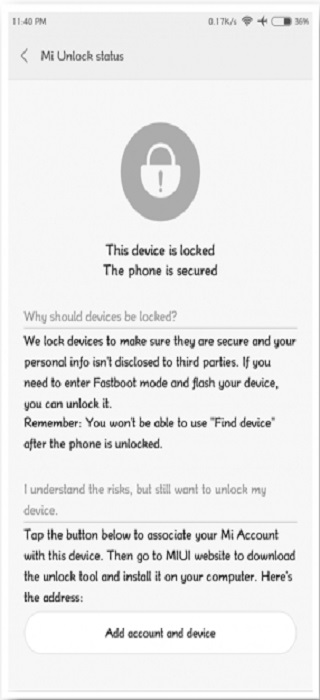
4. Select the Mi Unlock status option found under Developer Options itself.
5. Tap on Add account and device to link your Mi account.
NOTE: If you are getting the error 86012 then you should wait for a week before trying again as multiple attempts might lead to temporary blocking of your account.
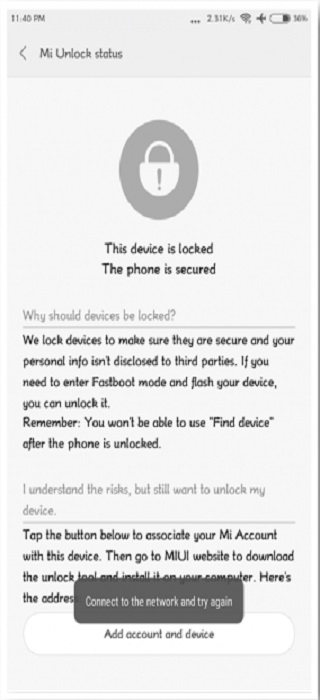
Also, if you are facing the “Connect to the network & try again” error then logout from your Mi account on the device.
Now, directly sign in from the Mi Unlock status page using the Add account and device option and the error should get fixed.
6. You will now get the “Added successfully. Mi account is associated with the device now” message.
7. Reboot the device in fastboot mode by pressing and holding the Power and Volume down buttons simultaneously.
8. Once in the fastboot mode, connect your Redmi Note 9S to the PC through a USB cable and launch the Mi Unlock Tool with admin privileges.
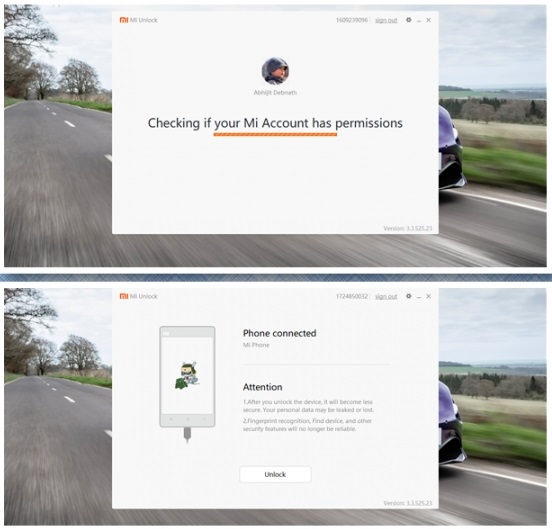
9. Click on Agree and login with your Mi Account ID. When you see the Phone Connected status, click on the Unlock button.
NOTE: If you get the “Current account is not bound to this device” error then repeat Step 5 and try to bind the account again. Also, you’ll have to wait till the given time in case you get the “Couldn’t unlock” error.
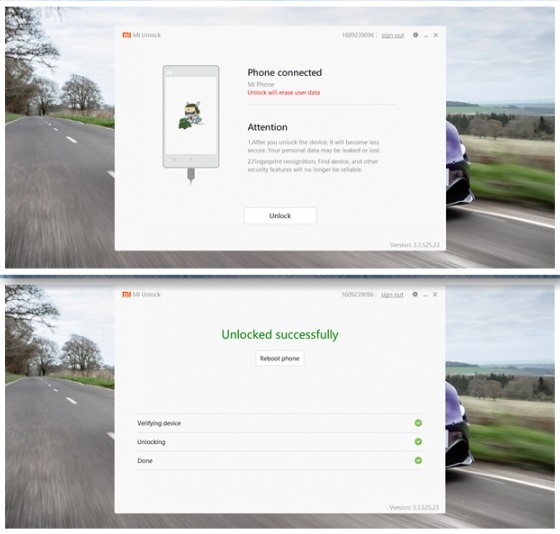
10. After the specified time, the Phone Connected status page should show the “Unlock will erase user data” message which means that the device bootloader can be unlocked now.
11. Click on the Unlock button to unlock your Redmi Note 9S.
Installing MIUI 12
MIUI ROM can be installed on a Xiaomi device either through the Mi Flash Tool (fastboot method) or Updater app (Recovery method).
Fastboot method (Mi Flash Tool)
This method requires the device to be unlocked so be sure to go through the Unlocking Bootloader section above before proceeding.
Moreover, download and extract the Mi Flash Tool and MIUI 12 fastboot ROM on your PC from the links given below.
- Mi Flash Tool: Link
Xiaomi Redmi Note 9 Pro (aka Xiaomi Redmi Note 9S) ROM
- Codename: curtana
- Channel: India Stable
- Version: V12.0.1.0.QJWINXM
- Android: 10
- Type: Fastboot
- Download: Link
- MD5: fd62a84961006413ed48e92dda6b18e5
- Type: Fastboot
1. Reboot your Redmi Note 9S in fastboot mode by simultaneously pressing and holding the Power and Volume down buttons.
2. Connect the device to your PC via a USB cable.
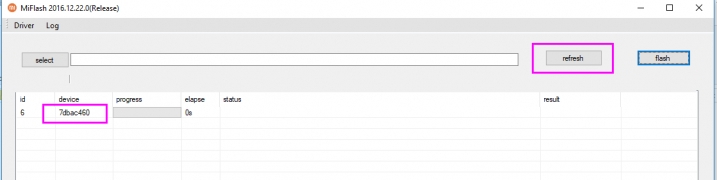
3. Launch the Mi Flash Tool with admin privileges and click on refresh so the device gets recognized.
4. Copy the path of the extracted ROM zip file and paste it in the Mi Flash Tool dialog box.
5. At the bottom right corner, select the clean all radio button.
6. Click on the Flash button at the upper right corner next to refresh.
7. Wait till the status changes to “Flash Done” and result shows “Success”.

Your Redmi Note 9S will reboot automatically and that’s about it. You have successfully installed the MIUI 12 update on your device.
Recovery method (Updater app)
1. After downloading the MIUI 12 zip file from the link given below, transfer it to the internal storage of your Redmi Note 9S.
- Device: Xiaomi Redmi Note 9 Pro (aka Xiaomi Redmi Note 9S)
- Codename: curtana
- Channel: India Stable
- Version: V12.0.1.0.QJWINXM
- Android: 10
- Type: Recovery
- Download: Link
- MD5: 3429e721e1ac98fcdce606234e3e83a0
- Type: Recovery
2. Go to System Update (Updater app) from the About Phone section under Settings.
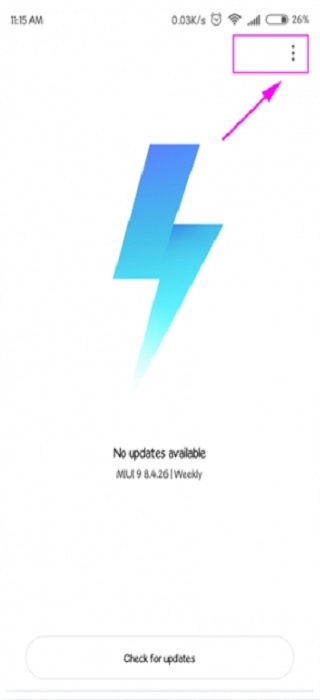
3. Tap on Menu (three dots) in the top right corner and select the Choose update package option.
4. Select the MIUI 12 zip file and tap on OK.
This will install the MIUI 12 update on your Redmi Note 9S. However, this method will not work if you are shifting from a beta software version to a stable one. For the official ROM installation guide from Xiaomi, head over here.
NOTE: These methods can be used to install ROMs on any Xiaomi device. However, ensure that you thoroughly follow the steps given above and only flash the ROMs that are meant for a particular device in order to avoid bricking.
That said, we hope Xiaomi soon releases the official MIUI 12 stable update for the Redmi Note 9S global variants.
Meanwhile, you can check out our MIUI 12 update tracker to get the latest information on the topic.
PiunikaWeb started as purely an investigative tech journalism website with main focus on ‘breaking’ or ‘exclusive’ news. In no time, our stories got picked up by the likes of Forbes, Foxnews, Gizmodo, TechCrunch, Engadget, The Verge, Macrumors, and many others. Want to know more about us? Head here.

Tags
Global MIUI 12 MIUI 12 Redmi Note 9 Pro India Redmi Note 9 Pro MIUI 12 Redmi Note 9S MIUI 12 Redmi Note 9S MIUI 12 manual install
Deveshwar Bhardwaj
901 Posts
I'm a techy who is particularly fond of Android smartphones. A writer who usually finds himself on the other side of the spectrum. An artist who likes to sing and play the guitar. Also a photographer when in the mood.
Next article View Article