Xiaomi is one of the leading smartphone selling companies in India. According to Counterpoint Research, Xiaomi holds a 30% market share in the Indian smartphone industry. The journey started back in 2014 & since then the company is ever-growing and expanding in the Indian market.
Well, the growth and success of Xiaomi can be inferred by the amount of revenue it made and the number of units it sold. According to the Economic Times, its revenue touched a whopping $5 billion in the year 2018-2019.
Xiaomi released the Redmi Note 9 Pro device in May 2020. The device features Snapdragon 720G (8 nm) Octa-Core processor and it comes with Android 10 out-of-the-box. The phone sports a quad-camera setup on the rear end which can be used to click some excellent photos. Its front camera houses a 16MP lens perfect for capturing some trendy selfies.
The device runs on a customized version of Android 10 with MIUI running on top of it. But, if you are bored using Stock ROM and want to explore some more options with rooting, this article will help you with that. Without further ado, let’s check out how to root the Redmi Note 9 Pro.
Root Redmi Note 9 Pro using Magisk
As of now, a reliable TWRP recovery is not available for the device. So, we will be using a Magisk patched boot image for the rooting purpose.
Step 1
First of all, you need to unlock the bootloader. You can do it by using Mi Unlock Tool which can be downloaded from the link below.

Step 2
Secondly, you are required to download the following set of tools to get started with rooting.
USB Driver – Install it on your system after downloading.
Minimal ADB and Fastboot (v1.4.3) – Install on PC, C-Drive recommended. Choose system-wide installation.
Step 3
Now, go to Settings > About Phone > Tap MIUI version 7 times. After that, you will be allowed access to the device’s settings as a developer.
Step 4
Enable USB debugging. You can do that by clicking on Settings > Additional settings > Developer options > USB Debugging and enable the toggle.
Step 5
Ensure your battery juice is at least 50% and connect the device with a laptop using a USB cable.
Note: Before proceeding, disable driver signature enforcement in Windows 7/8/10 64-bit.
The next process is to create Magisk patched boot image and; you are required to follow the below-mentioned steps for it.
Create Magisk patched boot image for rooting-
Step 1
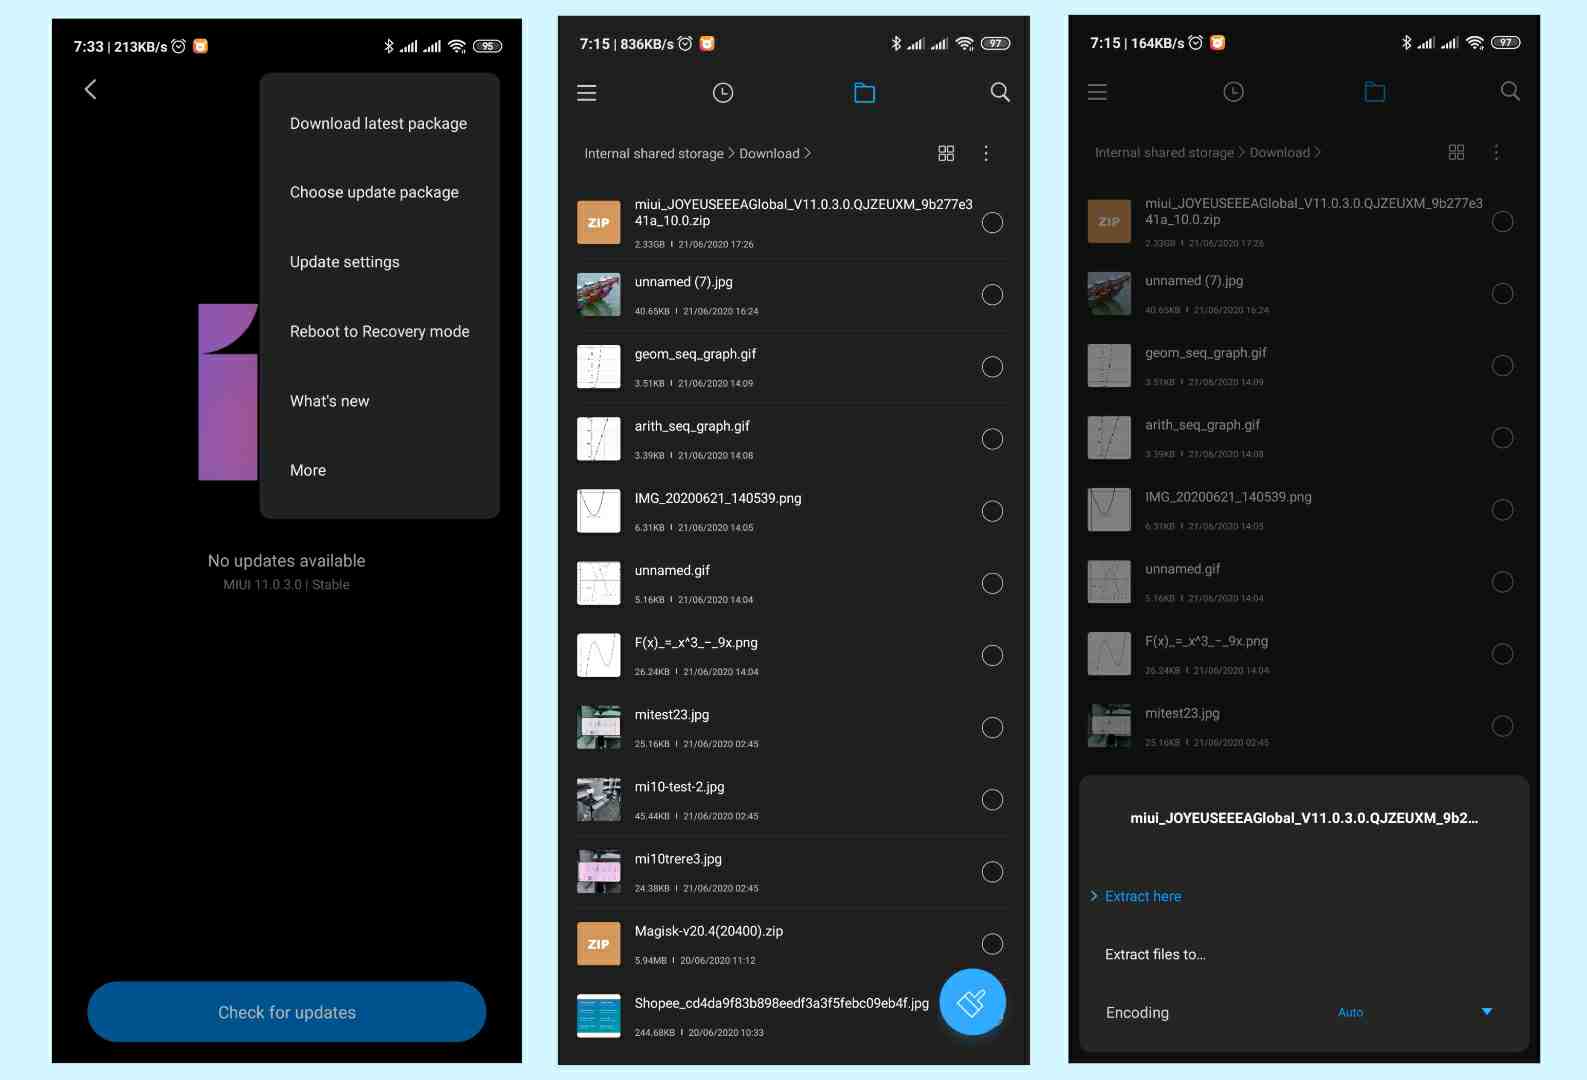
Firstly, open Settings > About phone > System update.
Step 2
Click on the 3 dots and download the latest package.
Step 3
Secondly, open File Manager > Download folder where the ROM is located. Extract the ROM file and choose Extract here.
Step 4
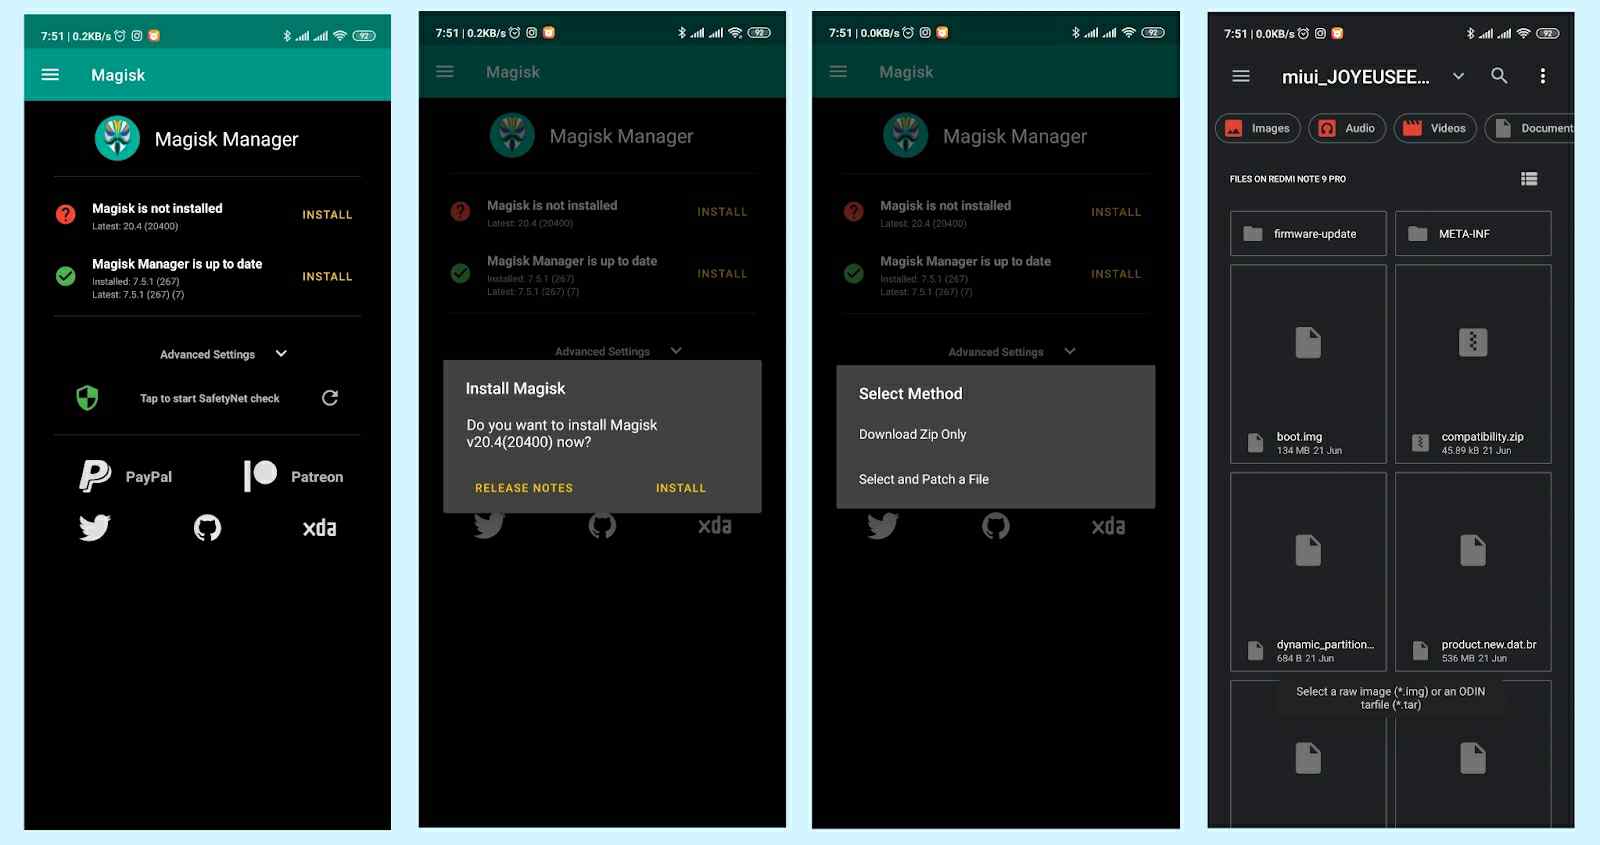
Finally, open Magisk Manager and click install both times asked.
Step 5
Choose “Select and patch a file”.
Step 6
Open storage and select the boot.img image file that you extracted.
Step 7
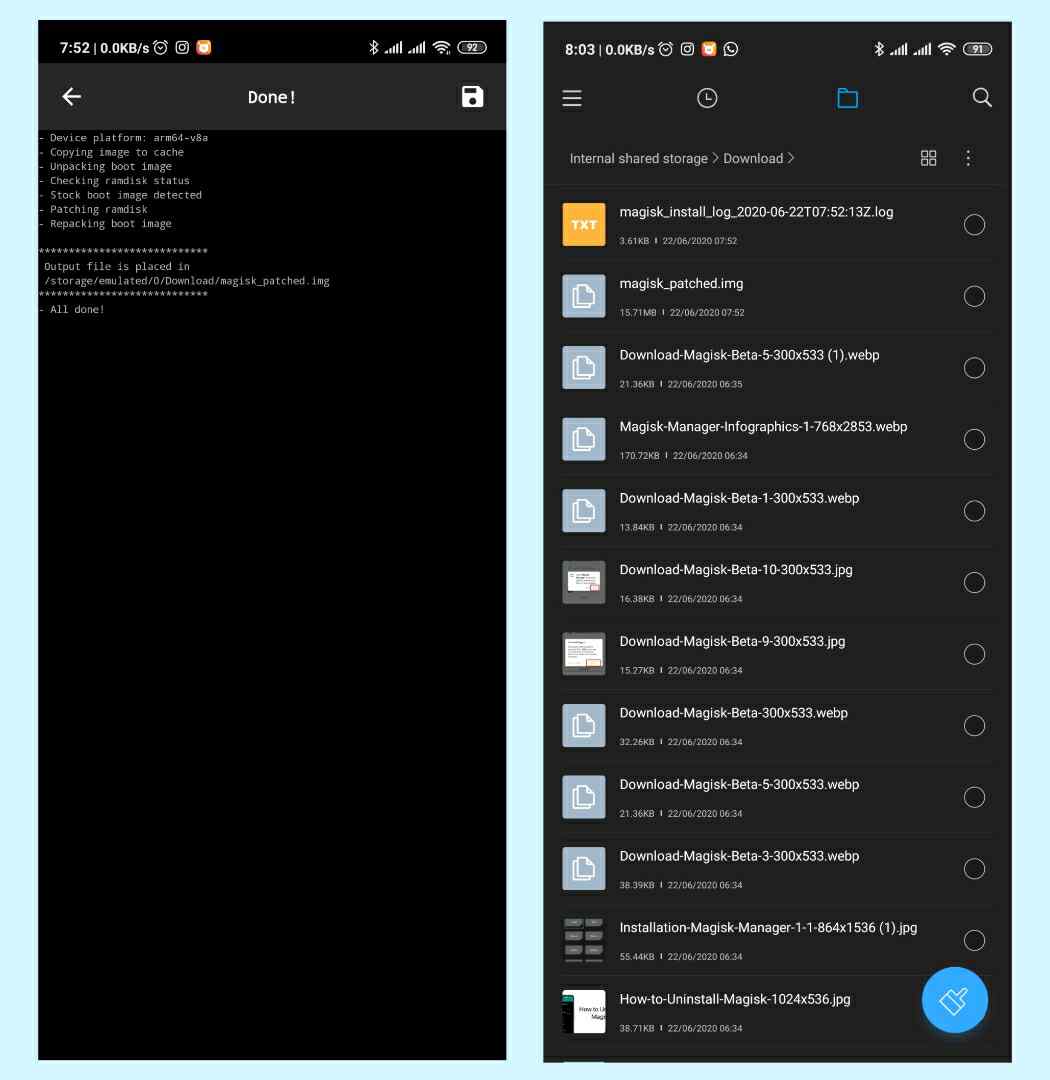
The patching will begin after you click on the image. It will display the following location – magisk_patched.img.
Step 8
When done, go to File Manager.
Step 9
Copy and paste the downloaded folder on your laptop/computer. This will help you to flash later for rooting. Now, as we are done with the creation of the patched boot image for rooting, we can proceed further to fastboot.
Flash patched image
Step 1
Move the patched boot image to the location where ADB and Fastboot are installed on your PC/laptop.
Step 2
Rename Patched Boot Image to boot.img.
Step 3
Next, reboot your Redmi Note 9 Pro in Fastboot by pressing Power + Volume Down button simultaneously.
Step 4
When done, connect the device to the PC/laptop.
Step 5
Go to the folder where ADB and Fastboot are installed.
Step 6
In the ADB and Fastboot, hold down the Shift key, right-click on the keyboard and choose “Open a command window here” or “Open PowerShell window here” from the pop-up dialog.
Step 7
Now, we need to flash the patched image by running the following commands.
Execute the following command to check if the device is connected properly:
fastboot devices
Next, fastboot flash the Patched Boot Image as follows:
fastboot flash boot boot.img
After flashing, enter the following command to reboot:
fastboot reboot
Finally after rebooting, launch the Magisk Manager App and click Install. So, with that, the status will be updated.
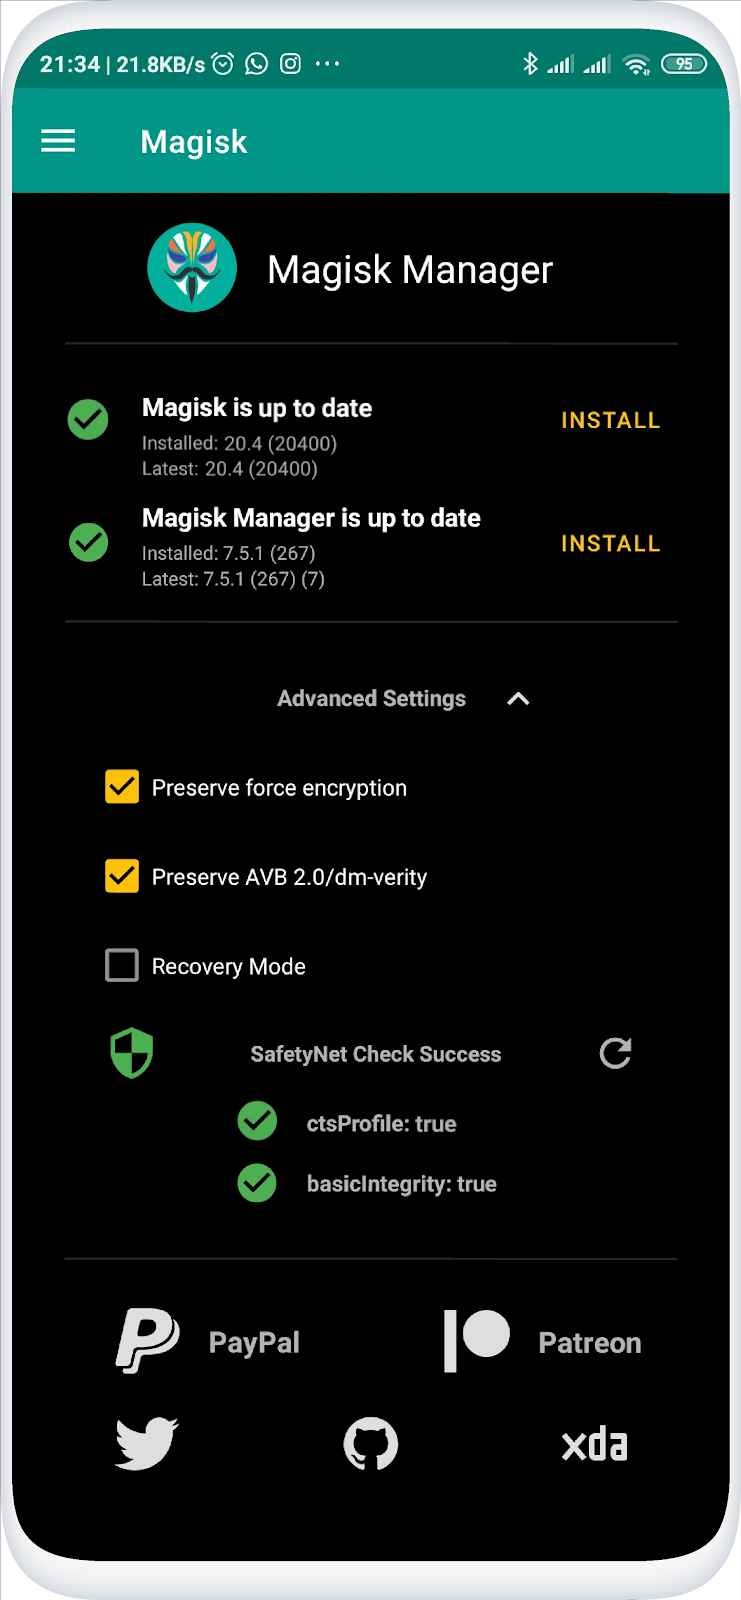
With that, you will have rooted your Redmi Note 9 Pro. If you face any trouble, feel free to discuss the issues with other readers in the comments section below.
Article by: Vaibhav Chawla
PiunikaWeb started as purely an investigative tech journalism website with main focus on ‘breaking’ or ‘exclusive’ news. In no time, our stories got picked up by the likes of Forbes, Foxnews, Gizmodo, TechCrunch, Engadget, The Verge, Macrumors, and many others. Want to know more about us? Head here.

TeamPW
548 Posts
Hello. Whenever an article gets published with the help of multiple people (like while training someone new OR in general contributed to by more than one writers), we use this author name to indicate team effort.
Next article View Article